
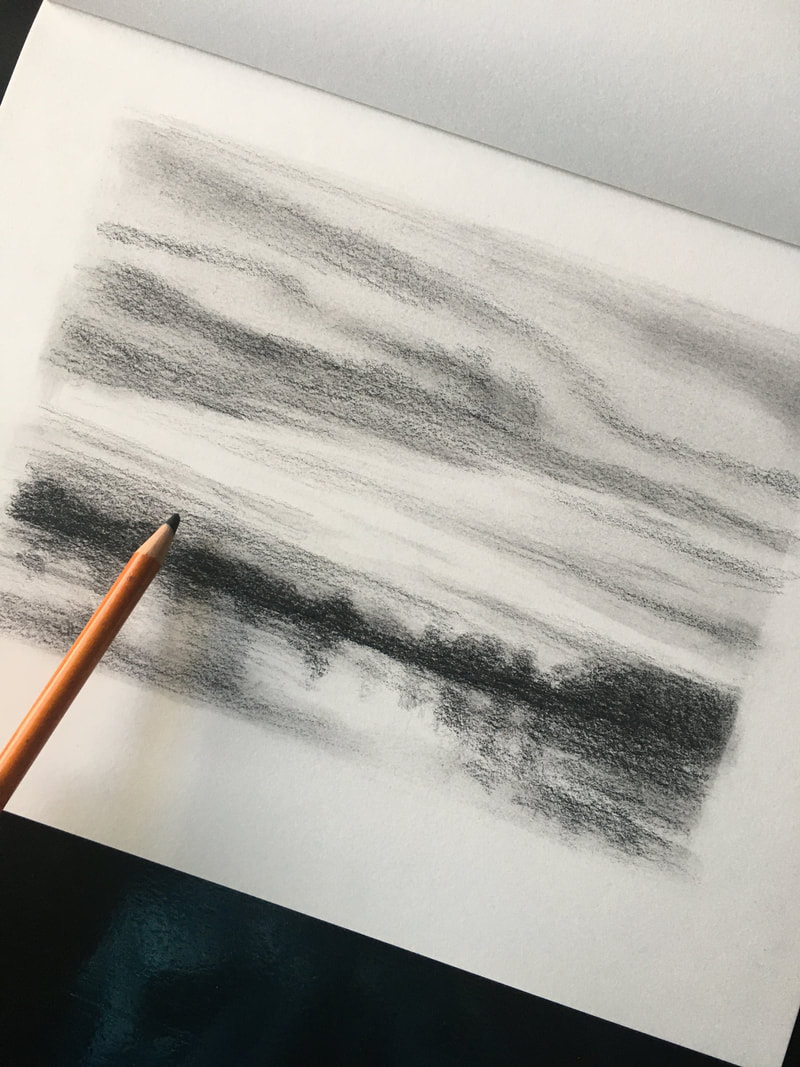
Value Study Exploration Tips:
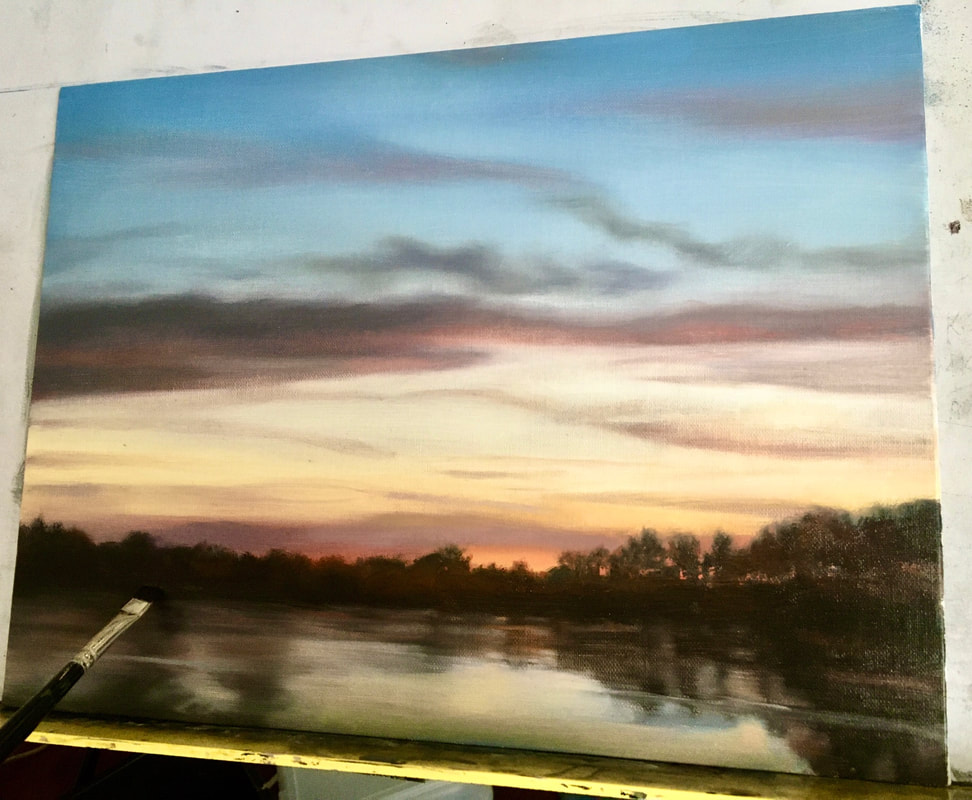
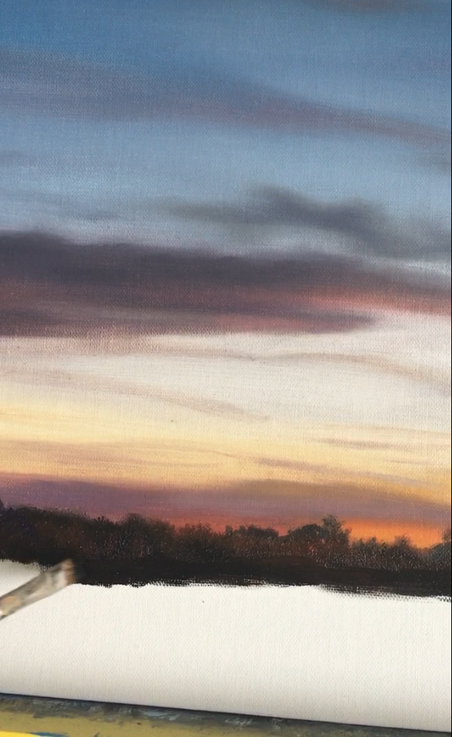 Work in progress. Here I am painting the horizon and down into the water. For landscapes I generally work top to bottom, and back to front. When the canvas is covered I go back over and add glazing and additional layering of paint to fine tune the painting.
This painting will soon be at The Galleries at Heartland Art Club. Contact Marie to inquire about this painting or visit Marie's private lesson's page to learn more about available art lessons. Here is a step-by-step oil painting progression. 1) After pencil sketching on a 9x12 canvas panel, I start with the focal point. For this painting the focus is the head and shoulders. 2) I paint the shapes of dark and light. Looking only at shapes right now and not at all interested in detail. 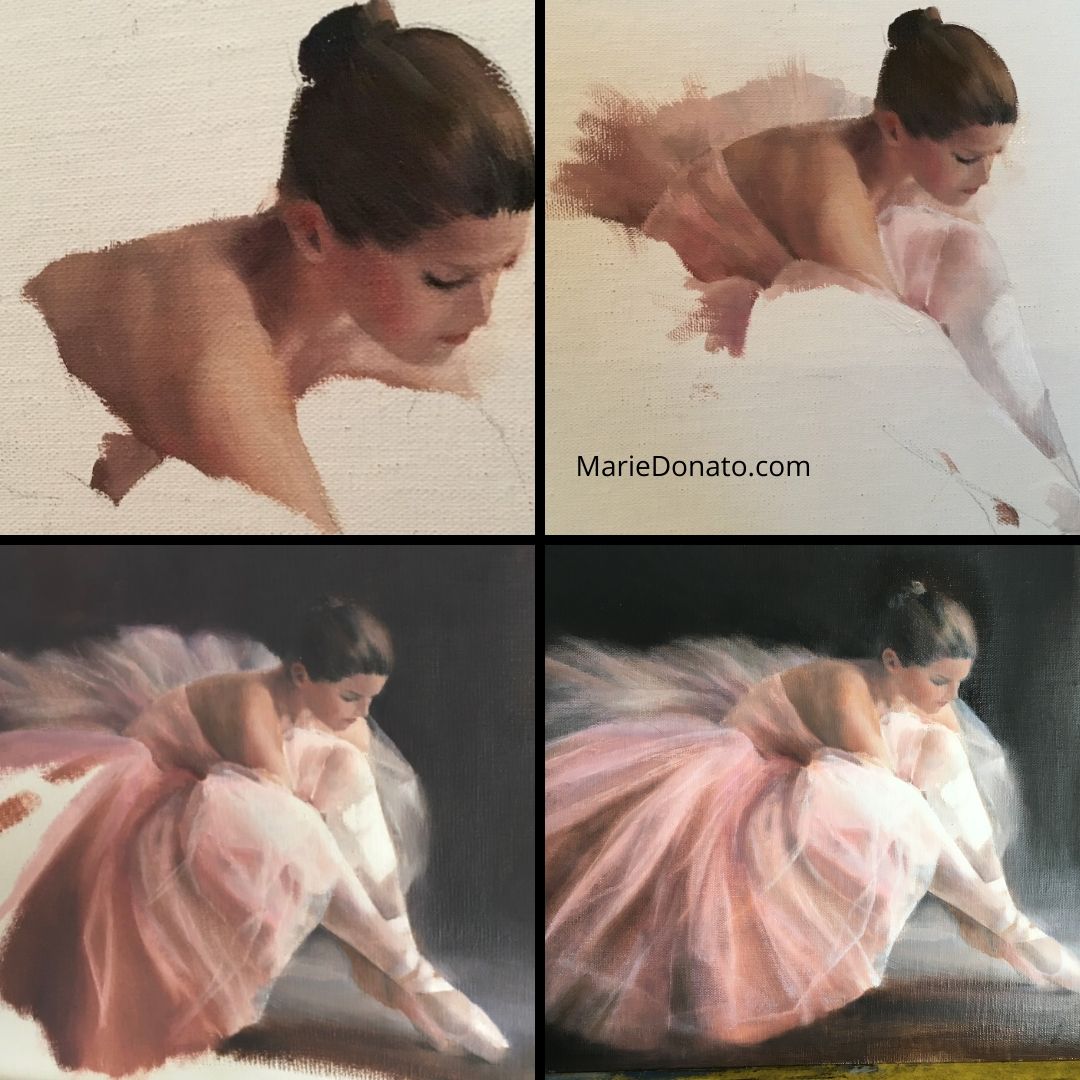 It's all about choices! Decisions have to be made constantly throughout a painting. 3) At this point I have put in a dark background to show the highlights. I chose to go dark with the background, but I could have gone light. 4) Within the tulle of her skirt, dark shapes have to go first to add the structure or foundation. Then mid tone shapes are added followed by light highlights and detail. The final focal is the emphasis of light shining on her legs and tulle skirt. So those shapes are strengthened. I hope you enjoyed this progression. Sign up on my email list to receive more of these step-by-steps and class information.
Learn more about virtual Individual Lessons with Marie. It is common to be too tight and focused on details EARLY ON. Ironically being LOOSE in the beginning will actually improve the final details in your drawing. You do not have to dread the blank sheet of paper in front of you. Here are some ways to help you relax and enjoy drawing. 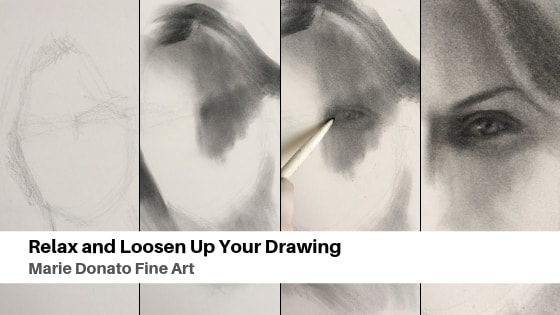 Remember the starting lines will get covered upBe loose and very general with your beginning pencil lines, make a soft suggestion of where the eyes and face will be. Remember that all of these soft lines will be covered up with future mark making and shading. So don't worry about messing up. Use powdered graphite to block-in value shapesWhy? Sometimes a pencil point or line can be too restrictive. Powdered graphite is easier to put down broad, loose, value shapes of darks. Please don't be afraid to get your dark shadows in, because again future marks will go on top. No ... the second photo above isn't darker than the photos to the right. You may think I lightened some of the eye area, I didn't. What I did was go darker with the eyebrow, lidline, and lashline. It's just an optical illusion. Those darker marks make the values before it look lighter. Have fun and enjoy drawing. Are you interested in drawing tips and classes? Learn about private individual instruction with Marie
For more drawing tips, Sign up for my newsletter to get info sent to you. 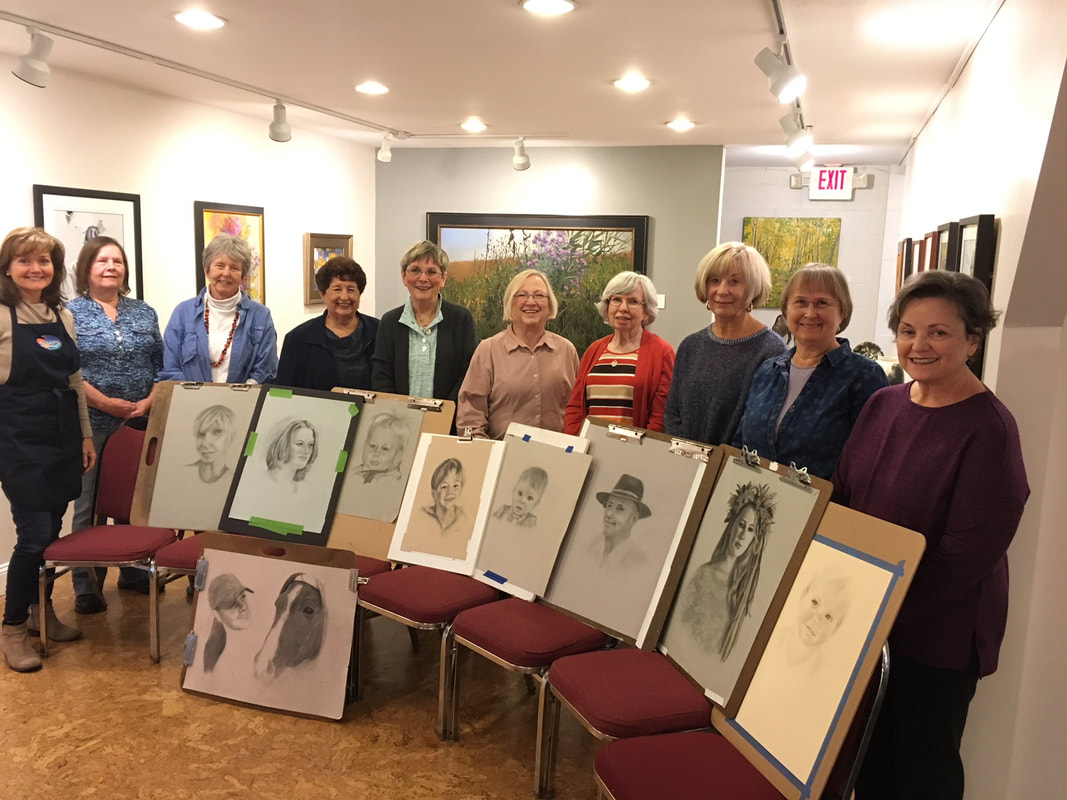 What a great class! Fantastic finished work by my Portrait Drawing Class at OA Gallery! The focus of this portrait class was drawing the portrait on toned paper using graphite and charcoal. It's great for students to have a connection to their subject, so students are encouraged to bring their own photos. 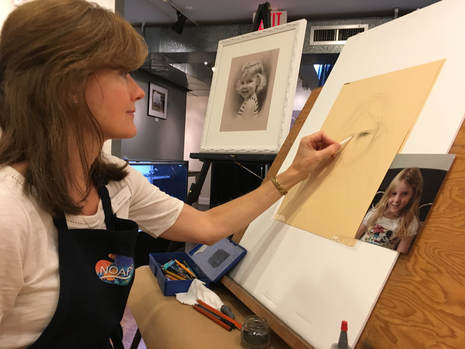 Demonstration Drawing where I begin by loosely laying in the large shapes of the head, face, hair and neckline and then I start the eye area. 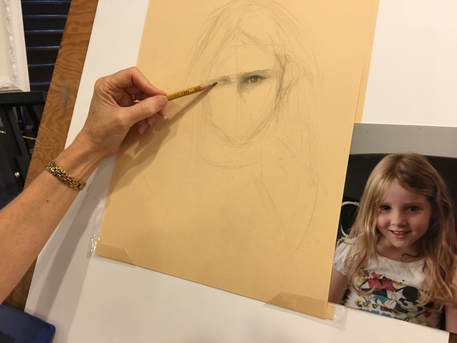 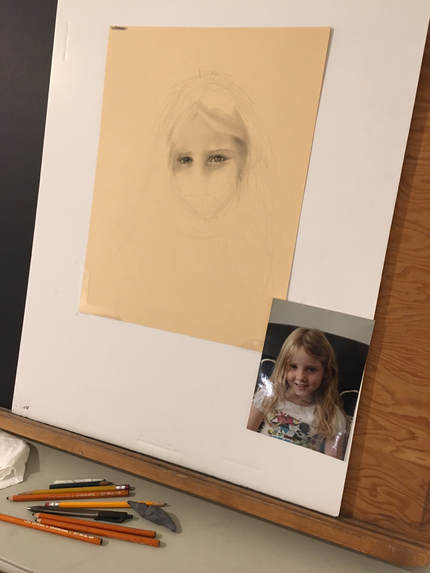 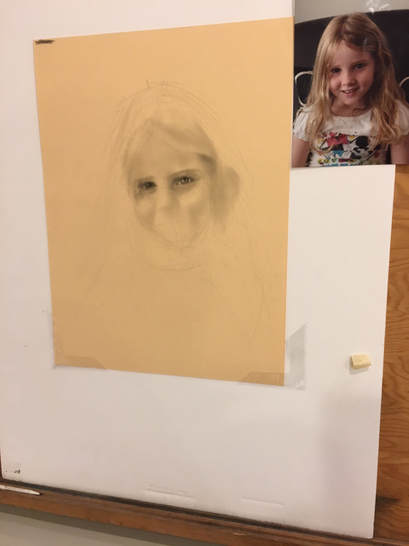 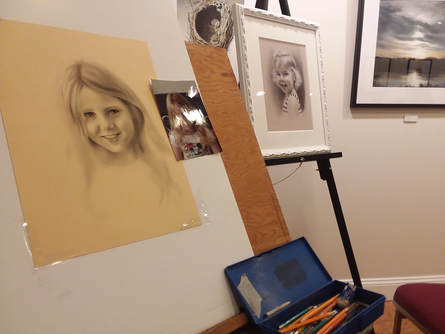 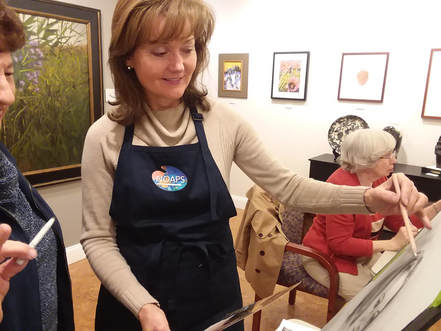  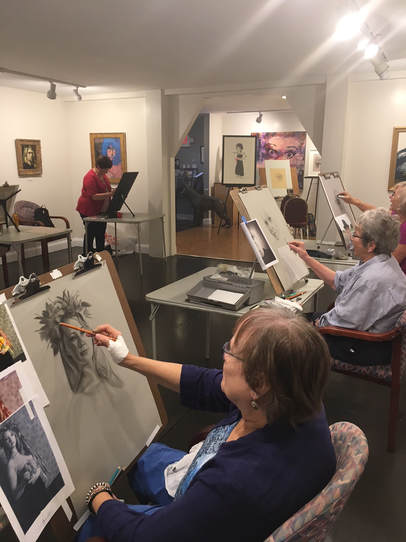 My art class students are working hard and making beautiful progress!  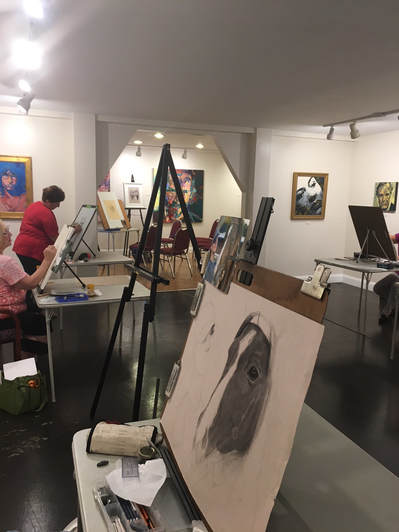 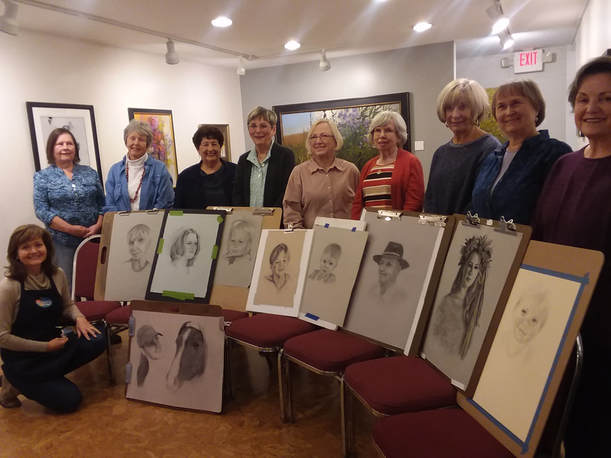 What a great job they did! I have the best students! Thank you all for making it such a fun class!! If you are reading this and are interested in taking Art Classes with Marie Donato, check out Marie's Art Class Info Page for more information. Have a Great Day!  Thought I'd share with you a little bit about how I approach my oil painting for a portrait. I like to start at the focal point, which for a portrait, is always the eyes. 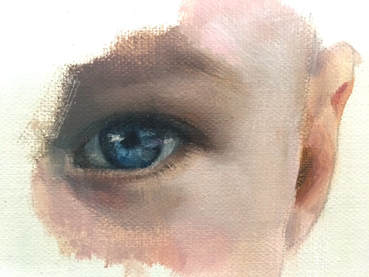 Just as I approach my drawing by shapes, I tell my drawing students to notice shapes and to draw the shapes. In painting I do the same and attack the focal point the same way, looking for the color shapes. (Please excuse the phone pics) 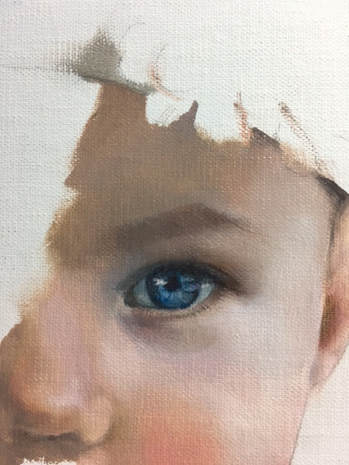 Apply the color shapes one next to the other. Where the color shapes meet, blend softly. 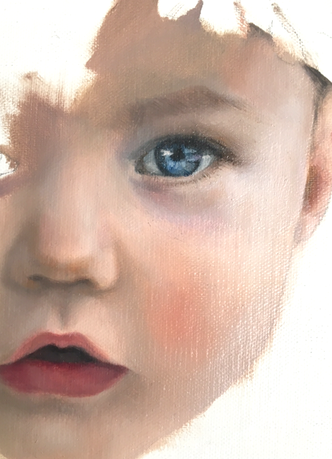 I paint wet-into-wet one section at a time.  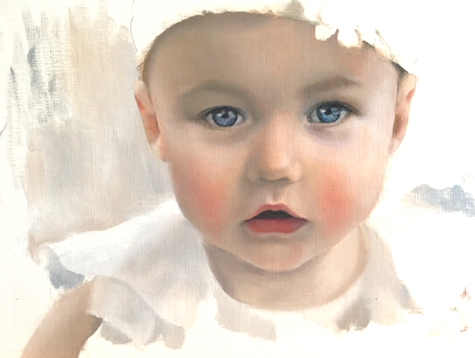 It is helpful to lay in some color in the background that can be used to softly create "soft" or blurred edges while the paint is wet. Some edges should fade or gently blend into the value of the background. 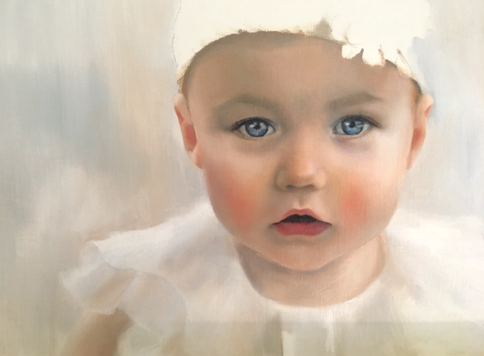 Glazes are added to brighten the color of the cheeks, nose and ears. The middle part of the face has more color in it than the top or bottom the face. 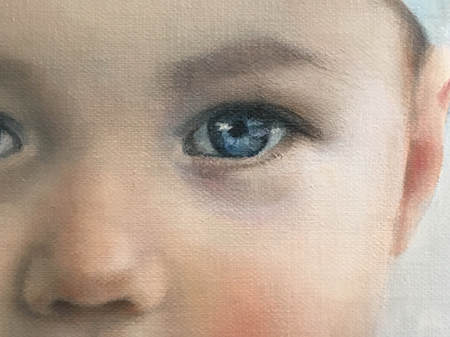 The white of the eye is never white, only the highlight will be white. 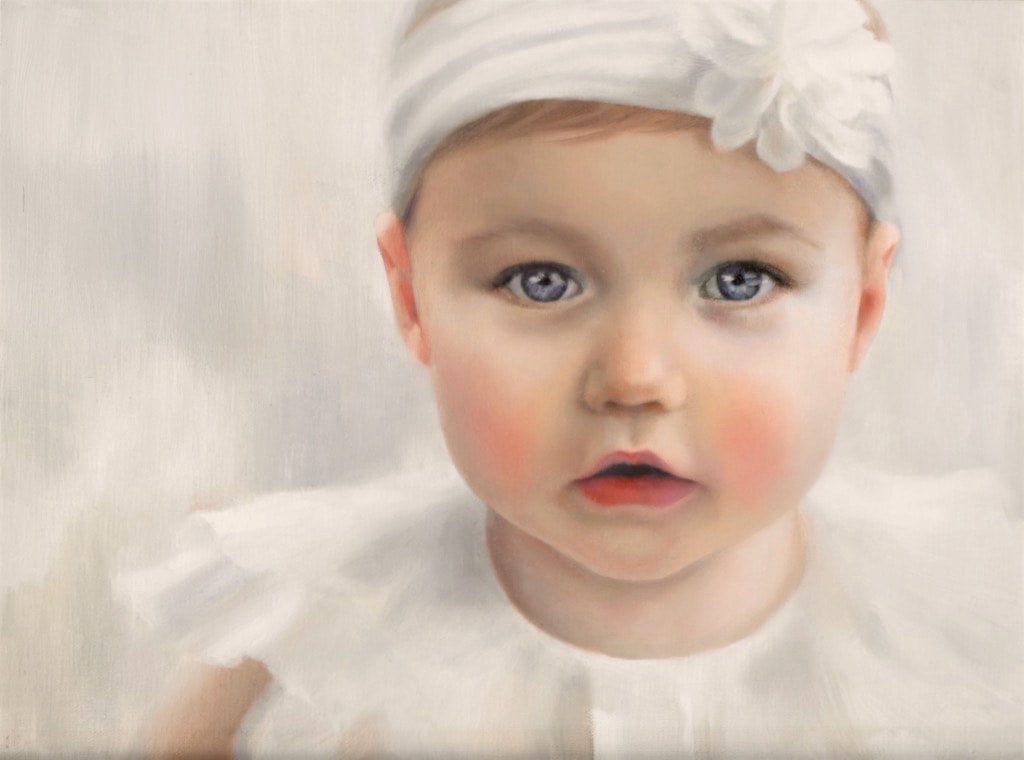 All done! For Marie Donato's Oil Painting Classes offered - click below.  This was my Portrait Drawing Demonstration for the class "Drawing on Toned Paper" held at OA Gallery. I was using black charcoal for the darker values and white charcoal for the highlights . 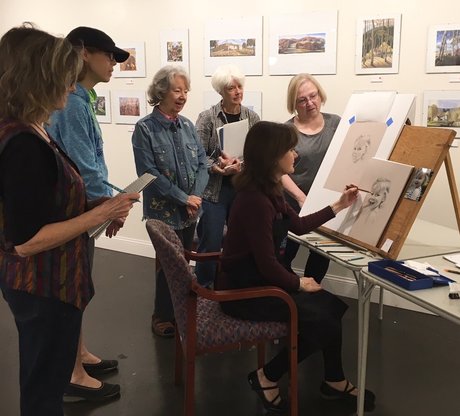 Learning to draw on toned paper using black and white charcoal, helps greatly in understanding value tones. Here are some of the steps in drawing a portrait on toned paper. The drawing is started lightly in the beginning. When the likeness of the eyes are getting closer then I'll start to establish more of the darks. Until then I keep the pencil marks light in case I need to erase. 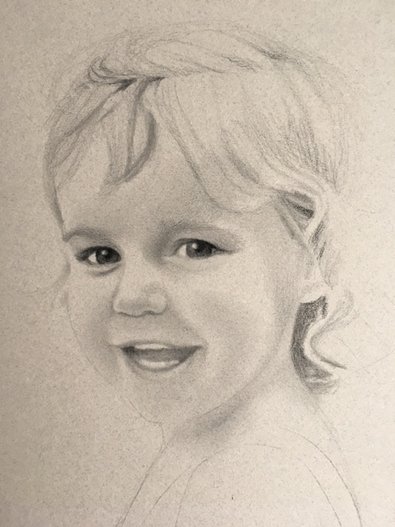 Here the dark values are established in the drawing. In a portrait the eyes will always have your darkest dark in the pupil of the eye and at the lashline. Using toned paper instead of white paper helps you to obtain your darkest darks and lightest lights while letting the paper be your midtone value. 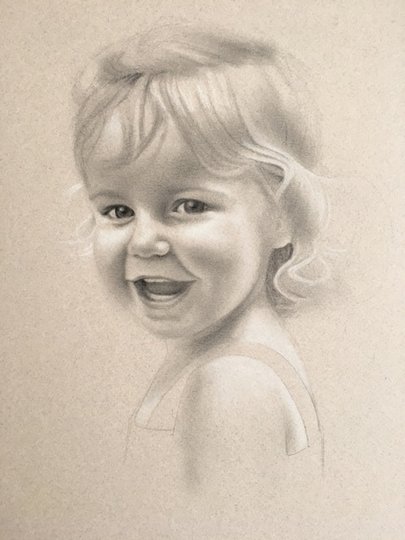 A white charcoal pencil is used to show the highlights. 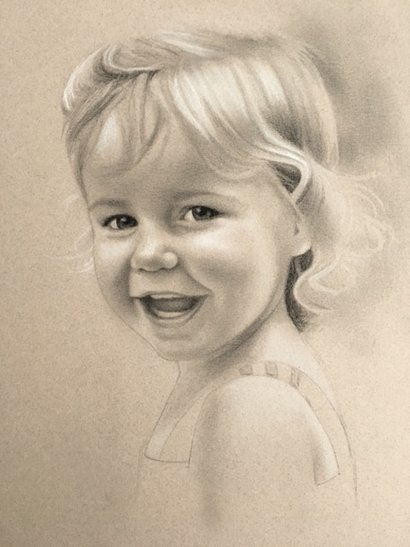 This is the stage where values are checked and corrected. They help to show the three dimensional quality in the drawing. 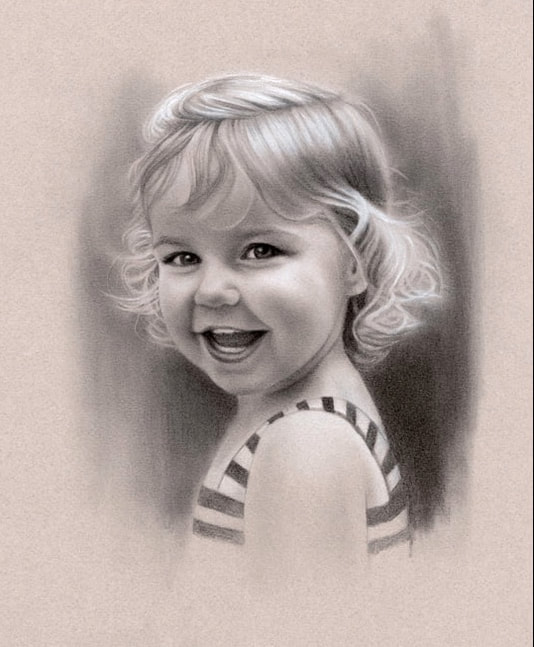 The portrait demo is finished and ready to be put in a frame! 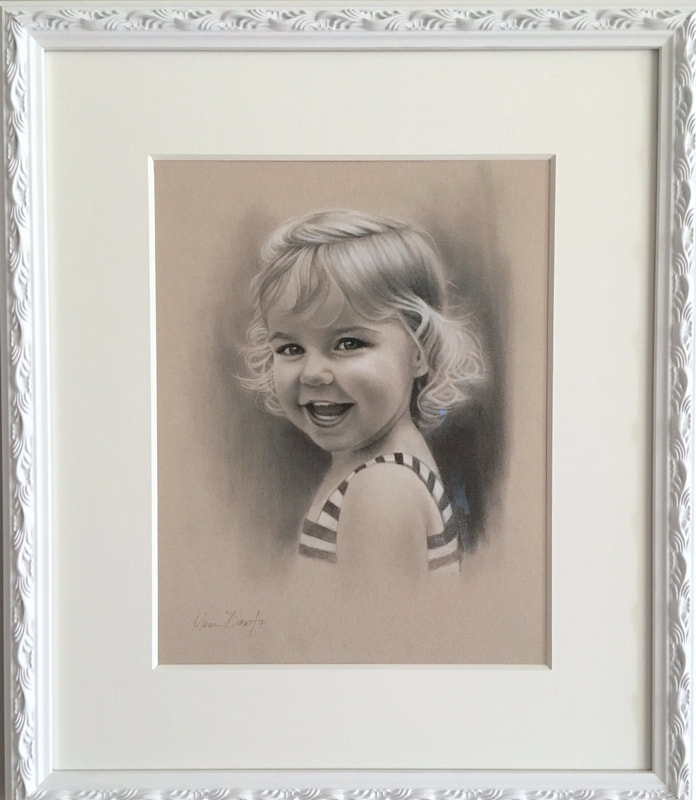 The portrait is complete! It can be viewed at the Galleries at Heartland in Kirkwood, MO. Working on toned paper is a beautiful and classical way to draw, which dates back to the Renaissance. 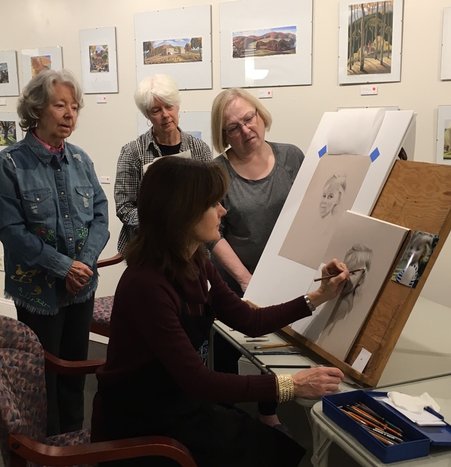 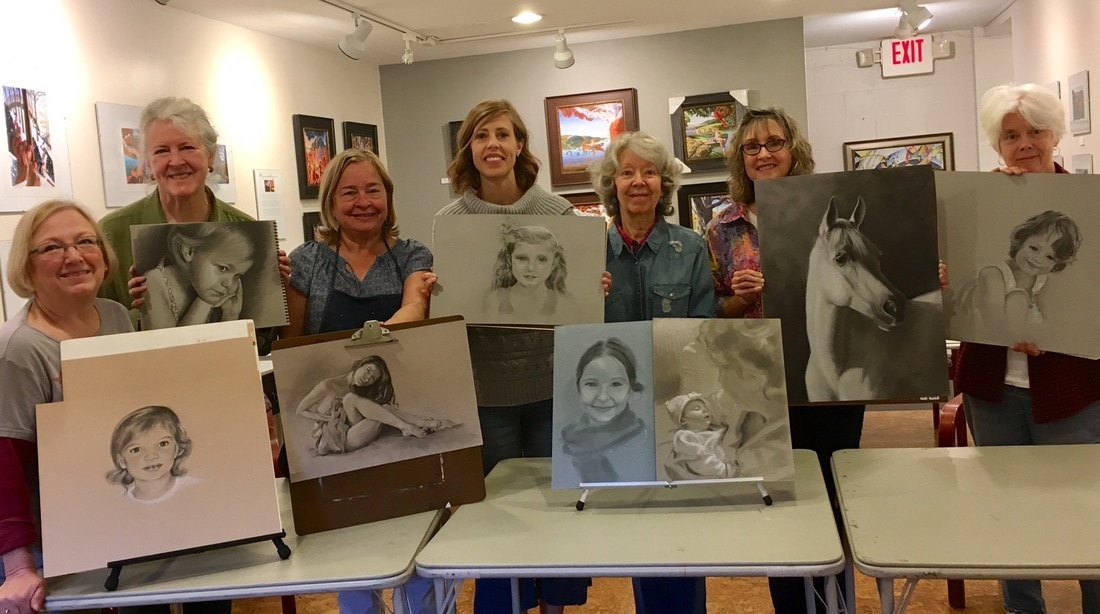 Look at these beautiful drawings! Everyone did a fantastic job! What a great class!
Would you like information about my art classes? Check out my classes here on my website. Or Sign up for my newsletter for new classes as they are scheduled. Here are recent drawing videos that were taken as I was finishing up the portrait details. I wanted to share with you my love for drawing today.
These drawings were completed on Strathmore Bristol Vellum paper. To finish these portraits I used General's charcoal and graphite pencil along with powdered graphite. The most exhilarating part of my job as an artist is getting those beautiful eyes looking back at me! I truly love being a portrait artist and am very thankful to God that I am able to be an artist. If you have any questions just let me know. Thank you for watching. Have a great day! 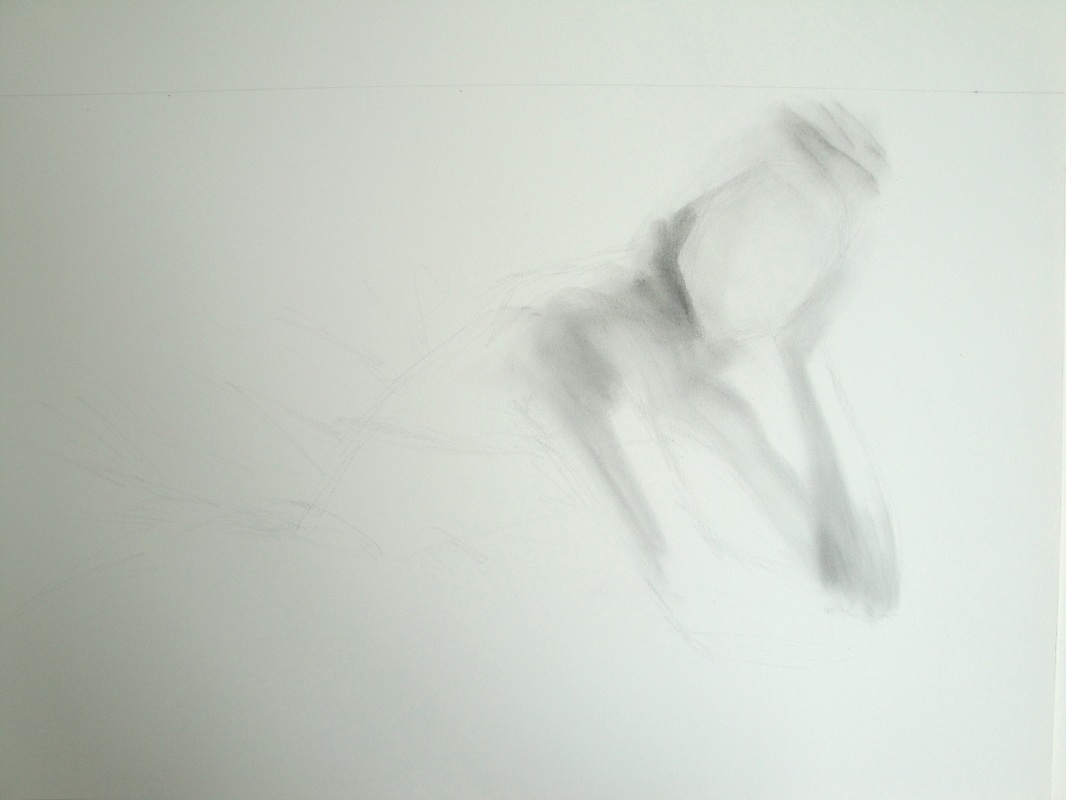 To start, I loosely block in the shapes with pencil and powdered graphite. Here is a step-by step demo showing how I develop a portrait graphite/charcoal drawing. 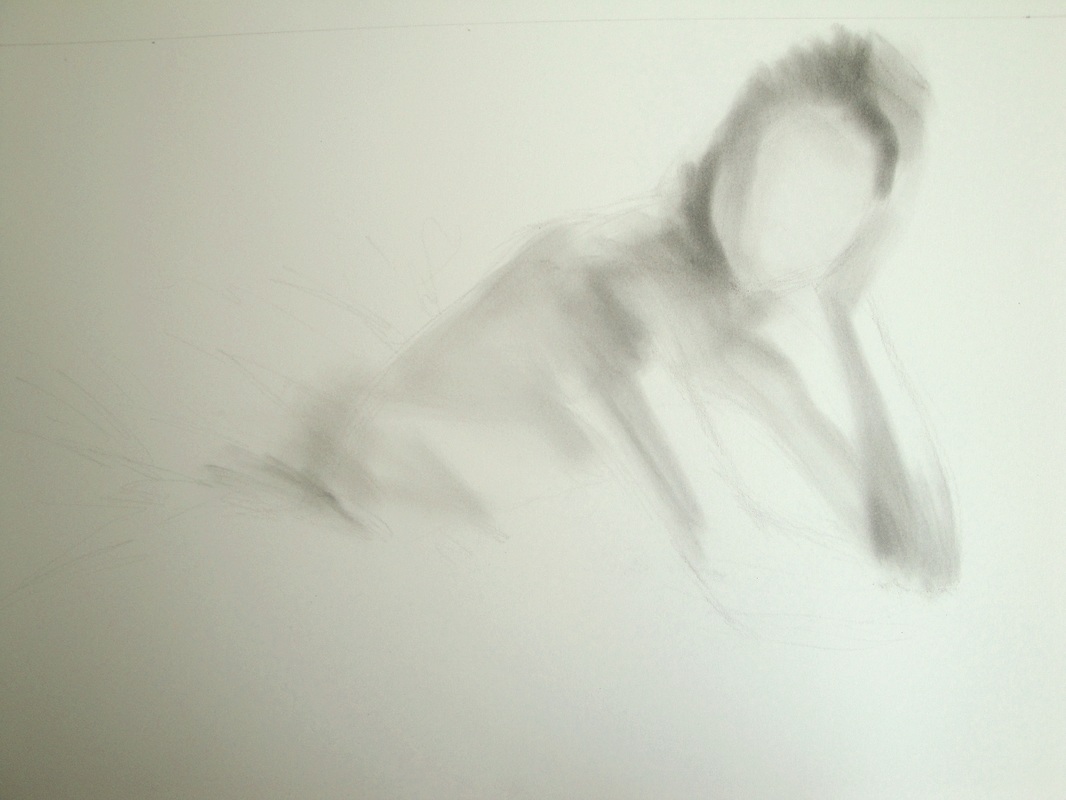 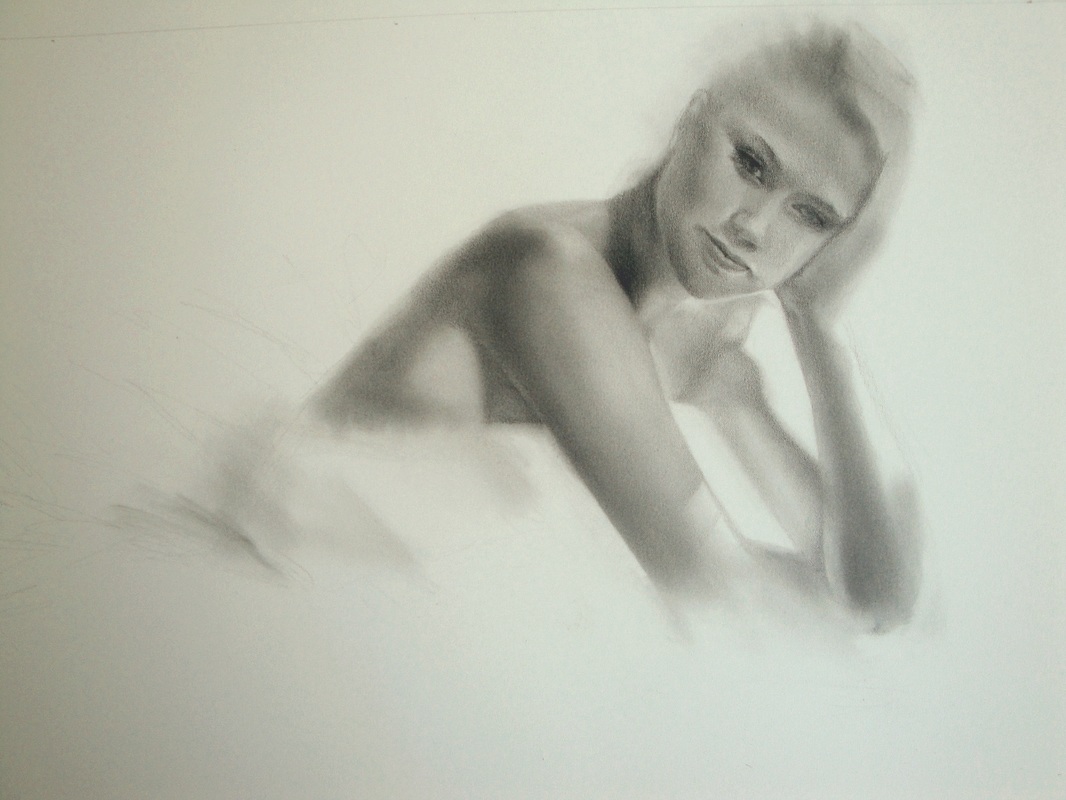 Here, I start to develop the face of the portrait, working toward getting the likeness. 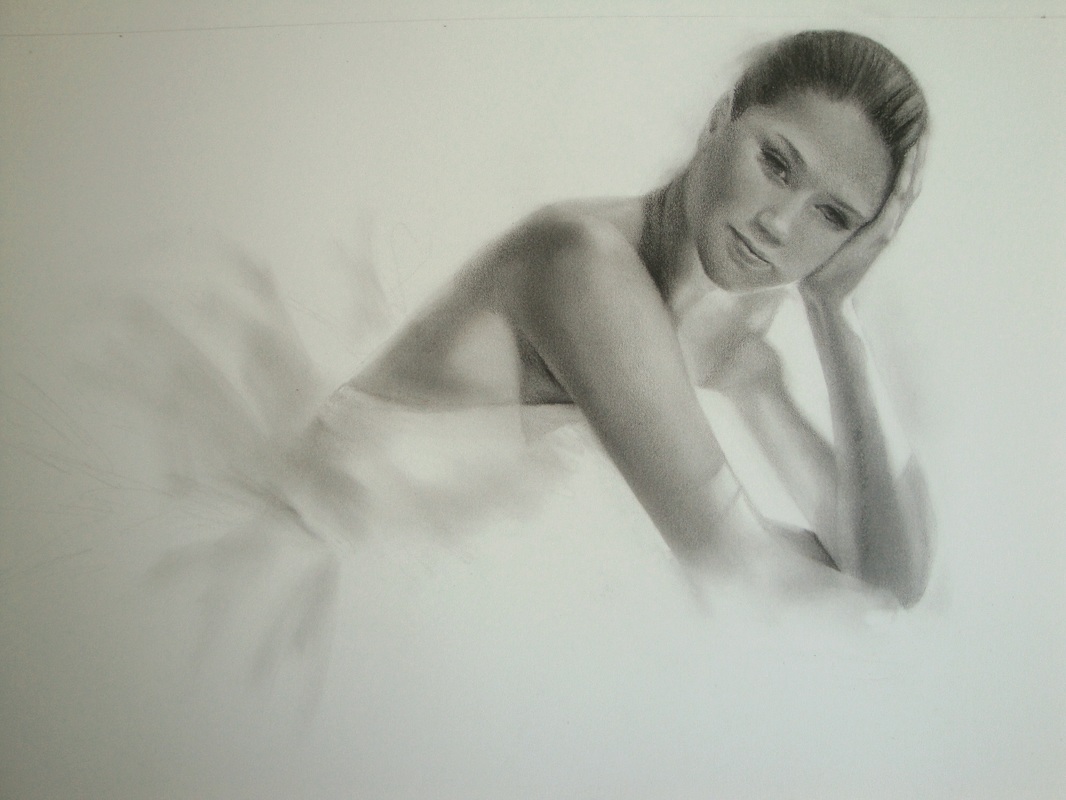 Once I feel comfortable with the face, I move down to the hand, arms and shoulders toning in form and capturing the shadow play of lights and darks from the sunlit window. I am using graphite pencils as well as powdered graphite. 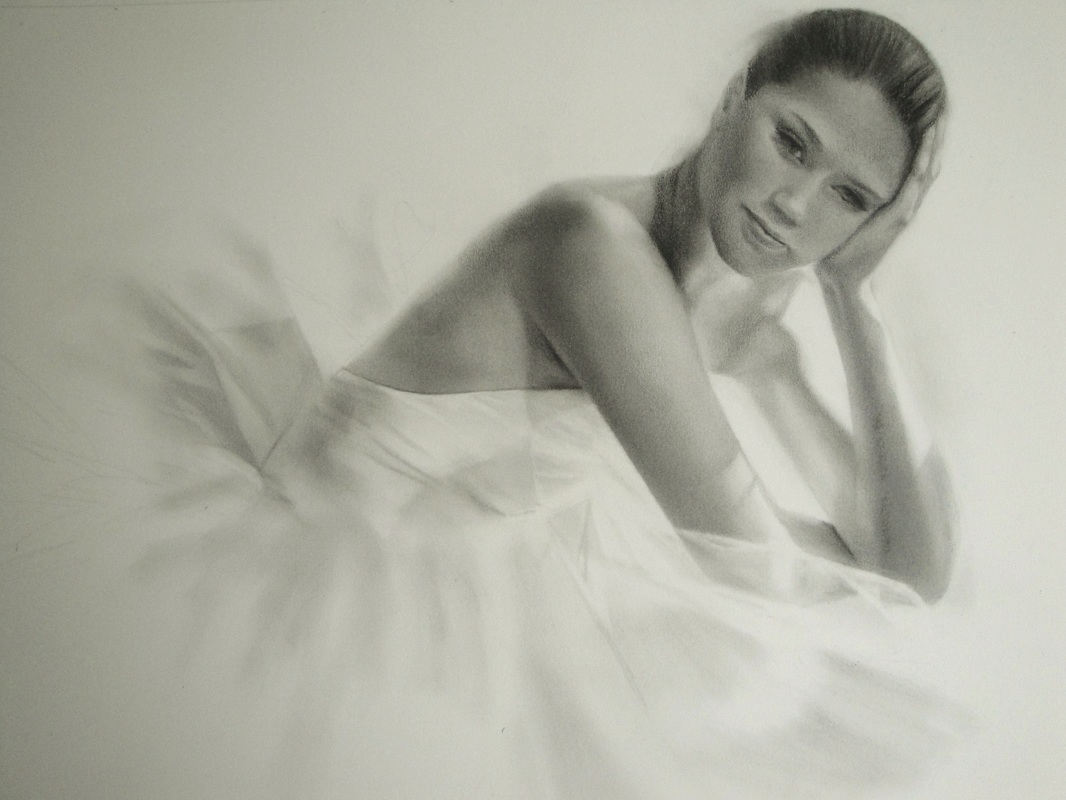 Here the fabric layers of tulle of the ballerina's dress are developed. For the contrasting darks in the eyes and hair, I am using charcoal pencil. 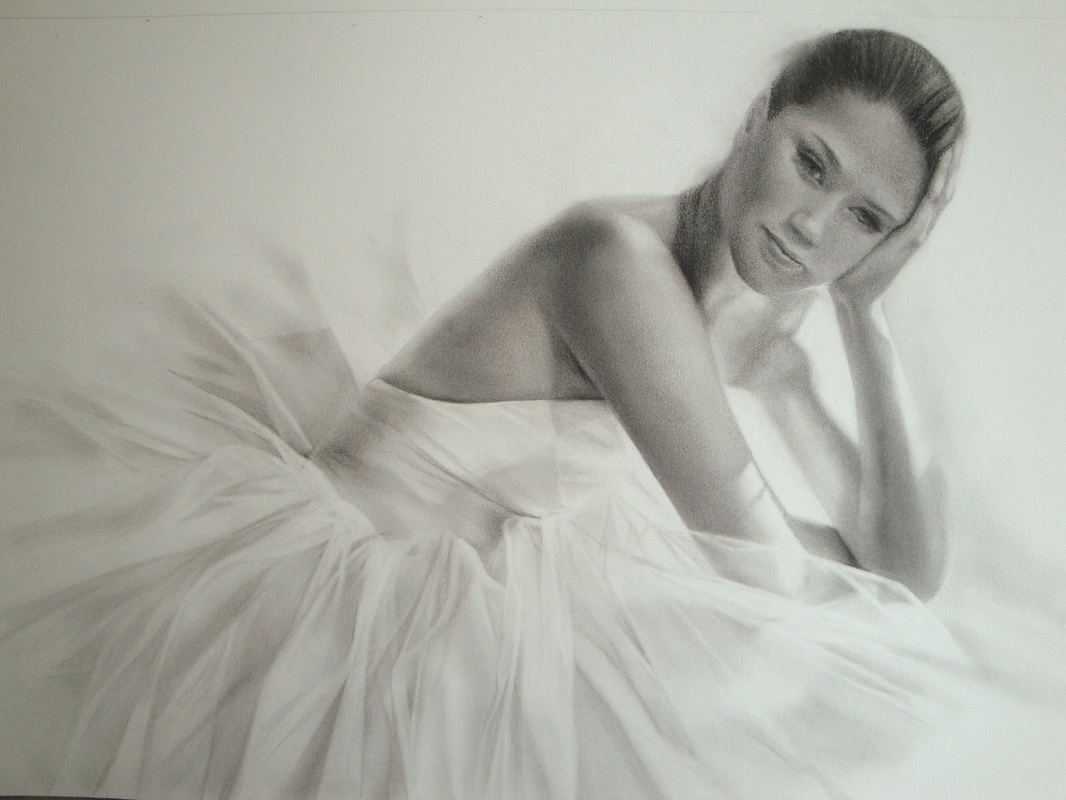 At this stage I am refining and tweaking everything making fine adjustments. To help with the highlights of the skirt I sharpen up the edges of the fabric with an eraser. 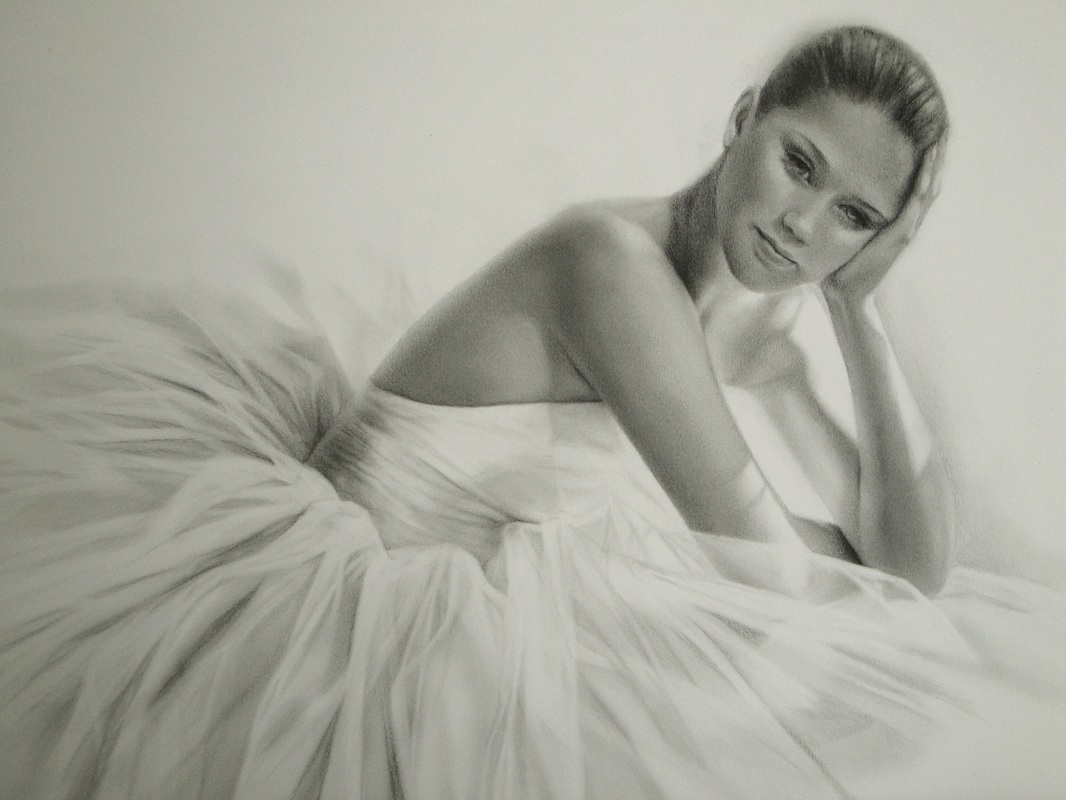 Here is the finished drawing! Drawing Class Information HereArt Classes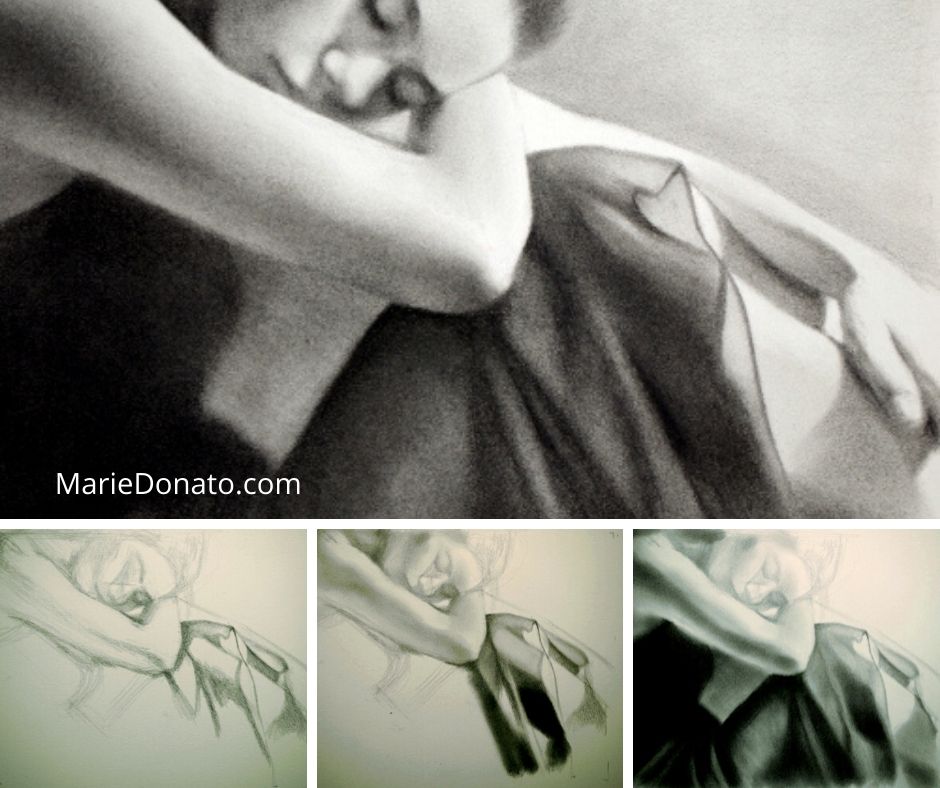 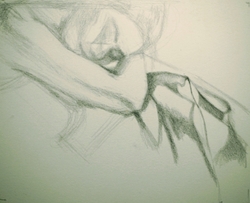 Welcome to a Fun Step-by-Step Drawing Demonstration 5 Easy Steps to Drawing! Drawing is the foundation of all art. Sometimes you may not know where to start... or just starting a drawing seems a bit overwhelming. Here is my approach to drawing in 5 easy drawing steps. I hope these steps will help you as they have helped many of my art class students! Step 1) Geometric Shapes and Angle of the Gesture Here lightly sketch the oval shape for the head, and the overall angle of the body, moving diagonally from upper left to lower right of the page. The diagonal provides strength to the composition. Proceed with shapes that you see to help you sketch the drawing. Continue on by progressing from large shapes to the smaller shapes and block in the facial features, more clearly, now. 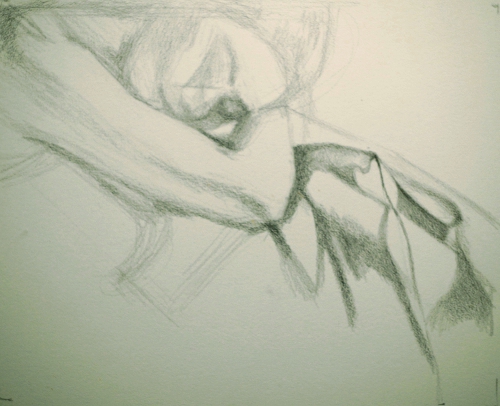 Step 2) Vertical and Horizontal Check In this step, it is critical to get the largest shapes possible decided upon and to slowly get the proportions correct. A helpful tip is to check how things line up vertically as well as horizontally. What I mean is, if you put a vertical imaginary line along the hairline, it would be in line with the outside of the arm and shadow shapes of the skirt. And an example of lining up horizontally, would be the top of the shoulder lines up with the outside corner of the eye. 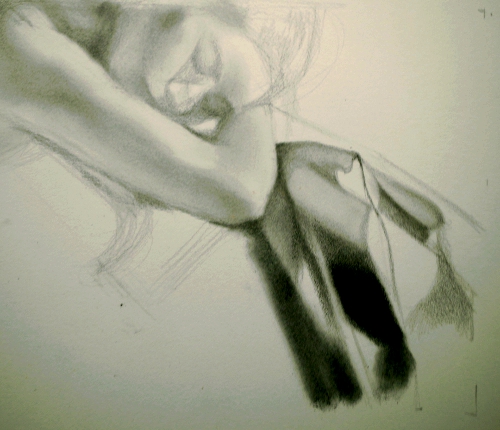 Step 3) Soft and sketchy In the beginning there is a lot of checking relationships back and forth, erasing, correcting and making sure the foundation of the drawing is correct. In this stage keep the lines very soft, sketchy and easy to erase. Many of the extra lines will get covered up in the shading. So the drawing, at this time, is a very loose and changing sketch before the shading is started. Once you have decided for sure on the correct proportions and lines, then darken those lines and pursue the shading more seriously. 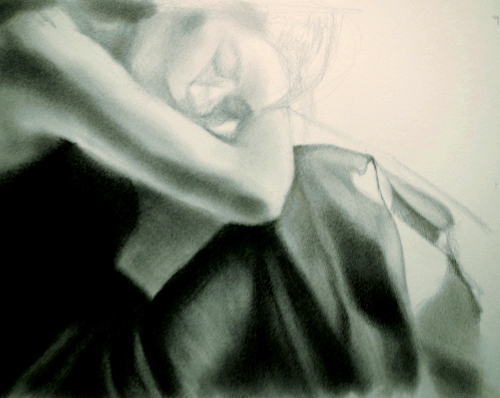 Step 4) Dark Values Next continue to block in the values or shading and try to find the darkest darks. Pay close attention to seeing the value shapes of darks and lights. Working on the values and keeping the darks consistent throughout the drawing is key. Step 5) Attention to Edges More shading is put in now as the dark values are deepened. Then finally much attention is given to the edges of the value shapes. Ask yourself, are the edges crisp and hard or fuzzy and soft? So a lot of sensitive adjusting to the edges happens at this time. Generally, most of the focused or crisper edges are at the focal point, which is the face and the diagonal created by the arm and legs. 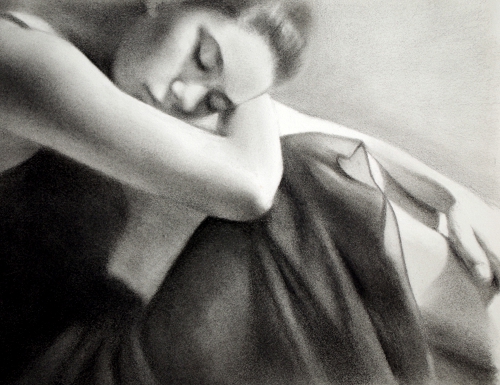 And the portrait drawing is finished!
I hope you found this demo helpful. Would you like to see more step-by -step demos? Don't hesitate to drop me a line..... Thank you for visiting! Art Class Information Here |
Categories
All
SUBSCRIBE
|
 RSS Feed